You may manage the DNS of a domain without a hosting account by following the steps below:
- Login to your client area.
- Click on domains tab at the top.
- Select manage DNS on the drop-down >> Click on the Add zone button and select the domain you intend to modify the records.
- Once done you can click on the edit button (pencil sign) at the right near your domain to edit the zone how you wish
If you already have a hosting account for your domain, simply login to the cPanel via YourDomain/cPanel or via by clicking the cPanel button for your hosting account in your client area
- Click here to learn how to login to cPanel.
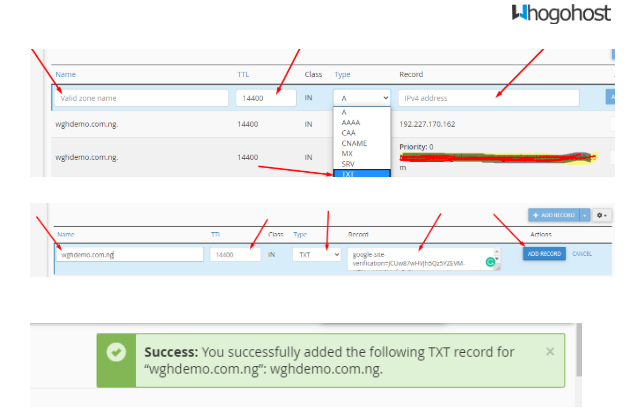
- In the Domains section, click on Zone Editor to manage the DNS of your domain
- Once you are in, click on Manage
- Click on Add Record
- Enter the records below in the appropriate fields
- Name: Enter Your domain name or the value given to you for this.
- TTL: 14400
- Type: i.e TXT, CNAME, SRV, NS, A, MX etc
- Record: Enter the code or destination of the record added
- Click on ADD RECORD button to submit
You will see a message that the record type has been added successfully.
Click here to watch the video of how to manage DNS from your client area
If you have any issues with this, simply send a mail to support@whogohost.com