- Sign in to the Google Admin console.
- From the Homepage, click Groups. Alternatively, click on Directory > Groups
- Click on Create new group.
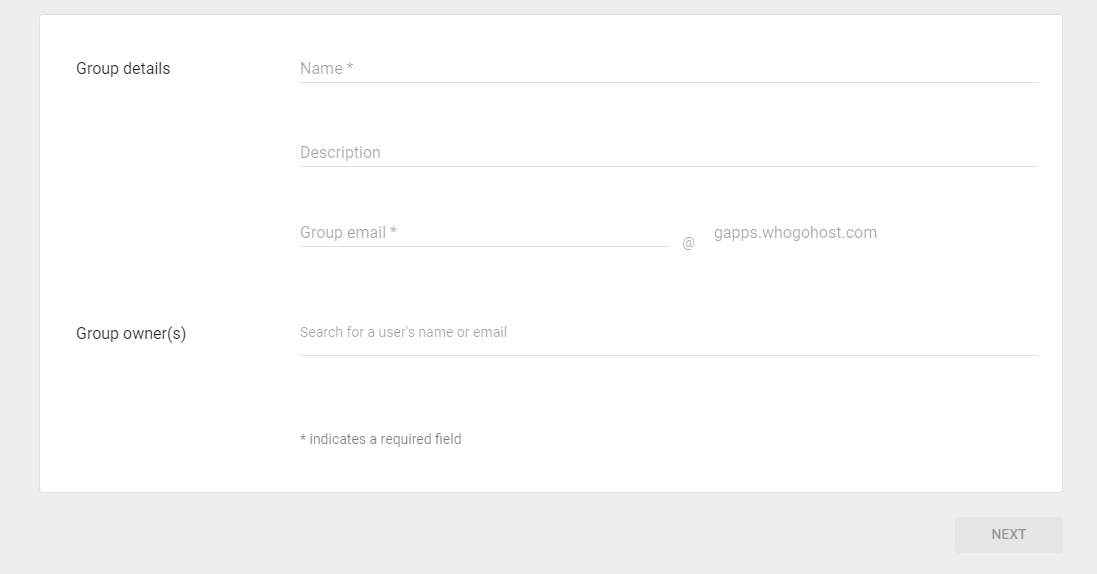
- Enter the following details in the group information form:
- A name for the group.
- An email address for your new group. If your organization's Google Workspace account has multiple domains, select the appropriate domain from the drop-down list.
- Optionally, add a description for your group. You can use this description to help users determine the purpose of the group. For example, you can include information about who should join, the types of messages you should send to the group, links to FAQs about the group, related groups, and so on.
- (Optional) Enter the email address of the owner(s) of the group. This can be added later.
- Choose a group access type—Public, Team, Announcement only, or Restricted.
Each access type includes predefined permissions for group owners, managers, and members, as well as whether the group is open to the entire organization or people outside the organization.
- Select who can be members of the group from the drop-down
- Optionally, toggle the box that allows external members from outside the organization to join your new group.
- Click on Create Group. You'll be taken to the group's page in the Admin console.
After you've created a group in the Admin console you can edit it to add or remove members, change a member's group role, change a group's name or description, and more.
Note: You can add up to 25 users to the group at a time. But there is no limit to the number of users that can join a group
How to Create a group via Admin Console
How to Create a group via Admin Console